
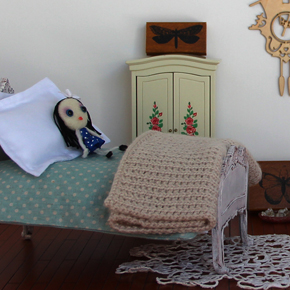
I have been inspired to make some new bedding for my Blythe dolls with some pillows that actually look soft enough to lie on 🙂 The pattern is available in my Etsy store and you can sell handmade items made from the pattern. It was really fun to do and very addictive – I have 3 more design themes in my head already.
And of course I had to spruce up their tacky plastic Bratz bed to fit their newfound stylishness. The original arctic white plastic looked so fake (lol, yes I know plastic is fake). So I decided to be brave and got out the paint brush and sanding block. I think the end result brings out the ornate details of the plastic (again, lol!). Now my mind is also thinking up new ideas for bedheads.
My technique
Here’s how I did it.
1. I gave the bedhead and base two coats of Burnt Umber acrylic paint, mixed with a little flow medium. The bed has screws to remove the pieces but I wasn’t sure if I’d be able to get it back together so I just painted carefully around the mattress. Any spills were removed with rubbing alcohol before it dried. I let the paint dry between coats (3-4 hours) and then overnight before applying the next step. I was careful not to paint too thickly around the details, actually going back and removing any excess with a fairly dry brush.
2. Then I painted the bedhead and base with about 3 coats of white acrylic paint mixed with a touch of skin tone to warm it up. I painted these layers quite thinly and was again careful not to apply too much paint over the details. After each coat had dried for an hour I sanded the edges and details to bring out some of the darker paint colour underneath. Some of the plastic also showed through but that was ok – better than stark white.
3. When completely dry (after 6 hours) I gave the bed a glaze to bring out the details. I applied a tiny bit of Burnt Umber acrylic paint with a wet brush, getting into the grooves. Then I wiped it off with a wet Chux cloth. I kept doing this until the desired effect was achieved.
I hope you will give it a go. Please let me know if you do and share some pictures.